So after returning from St. Kitt's, I started working on a cartonnage etui for my brother's fiancée, Becky. Her birthday is at the end of June, and I wanted it to be done in time for that.
I based the overall design off the Wonder Chest that I made last year (Part 1 and Part 2). But I altered the dimensions and made the lid flat instead of curved (because without a kit I had no confidence in my ability to make a curved lid). This meant cutting out all my own chipboard pieces, which is a pain, but with my CARL cutter, it's a lot easier than using a box cutter.
I started the same way as I did the Wonder Chest, by making a three-sided box:
Then I added risers on either side and in the middle to create space for two drawers:
Before putting the double-layer platform on top of the risers, I made the drawers to make sure they would fit in the space (it's easier to measure all directions before the platform is put on). Here's one of the drawers in progress, with the frontispiece clamped to the rest of the drawer:
Once the drawers were made, I put the platform on and made sure the drawers fit. Happily, they fit like a glove—here's one of them in place:
I then put risers around all three sides on top of the platform (but sadly forgot to photograph this) to support the next single-layer platform. And then I made one big drawer for that section:
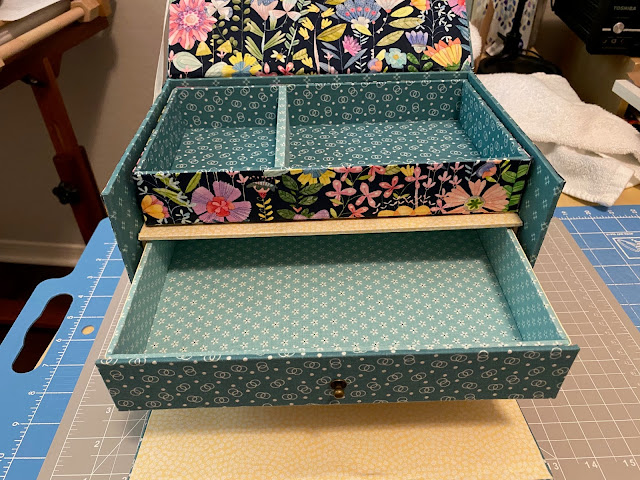
I wanted to make sure Becky had space for longer tools and supplies, so I left this drawer without any dividers. This drawer was a little too snug and hard to pull in and out when I first put it in the completed middle section:
So I forced the drawer about 1/4 of the way open, wedged some small pieces of chipboard on either side between the drawer and the inside risers and left it over night. This loosened up the fit just enough that it now slides in and out smoothly. Whew! I was a little worried, but my little trick solved the problem.
I then made a removable tray to set on the top platform. It's slightly deeper than the tray on my Wonder Chest, but I thought that would be better for Becky's embroidery supplies:
I put a divider in this tray so she could keep smaller items separate from larger ones. And here it is in the larger box:
The next step was to put together the outer lid and then attach a ribbon to hold the lid up when the box is open:
Once the ribbon was attached, I could finish the inside of the lid and fully attach it to the inner box:
And that is this etui completed! I think it turned out so beautifully. The colors are very similar to my Wonder Chest because those were the fabrics Becky liked from my stash, but I used one darker teal fabric with little bubbles on it in this version, and it's so striking. I actually prefer the color combination with the darker fabric. Here's a shot with the smaller drawers open:
And one with the middle drawer open so you can see all the colors together:
And finally, here is the completed box all closed up:
I put feet on the bottom so that the bottom drawers would slide out easily when the lower front lid is down and a handle on the top so Becky could carry it with her when she travels between my brother's house and hers.
Her birthday was last week and I gave this to her. I'm happy to say that she really loved it. She told me she couldn't stop staring at it and would treasure it forever. 😊 And honestly, knowing she's so happy with it makes it all worth it.
I'm working on another cartonnage box right now—a jewelry box for the daughter of one of my closest friends—and doing some work on my phase 4 Japanese embroidery piece, so hopefully I'll have some updates on one or both of these soon. But that's all for now. Happy Fourth of July!


Comments
Post a Comment