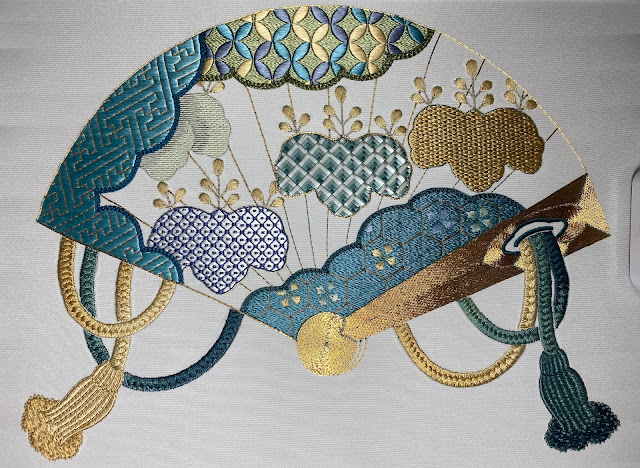
Hiogi is done! And I'm so happy and proud of myself. It took me 11 months and six days to finish this piece. But since my tutor said it's not uncommon for this piece to take two years, I feel really good about getting it done in that time. I do still have to do the finishing process, of course, but the stitching is done.
So without further ado, let's talk about the final fan outline, which was the last step. I started by couching down a pair of #4 copper threads with my teal couching silk at 3mm intervals:
It was a little tricky covering up the needle holes of the sayagata foundation at times. My edges weren't quite even everywhere. But I did my best and tried to get a nice sharp corner when I got to the top edge:
Going along the shippo cloud border was even trickier because it was raised up so much (the cardboard padding under the shippo shapes gave me some grief). But here is the first row complete. It really looks almost done, though the outline is a tad too narrow here:
Then I went back to the beginning of the left side again and started adding the third strand of #4 copper. I couched it down with the second strand in the intervals between the first row of couching stitches, to create the traditional bricking effect:
It was a little difficult at times to get the needle between the first pair of copper threads because they were couched down so snugly, but I used a very thin #2 couching needle and it went smoothly for most stitches. And here, after more than 11 months, is my Hiogi fan done:
That third strand of copper really does give the outline the thickness it needs to feel complete. And I love it! It's much brighter than my phase 2 fan, with a wider variety of colors, particularly contrasting colors. But I think it's lovely. I know it's not perfect, and I'm okay with that. It's a beautiful step in my JE journey, and I'm satisfied with my progress. I will hang this on my wall with pride! 😊


Comments
Post a Comment