My cloud borders are done at last! I have been waiting so long for this step because the very first thing I stitched was the sayagata cloud foundation. That cloud has just been sitting, incomplete, for about 10 months.
But the cloud borders had to wait till the end because they're supposed to cover up the holes at the ends of the fan rib lines (which are mercifully done now). And then it took me some time to learn how to make the katayori thread I needed for the borders. I will do some posts about how to make katayori and karayori thread at some point, but the process takes all my hands and then some, so I need to get a friend to help me take pictures. For now, here is the finished katayori for my hanabishi cloud border:
I really think this one turned out great—nice and ridgy with the teal silk fluffing up a bit around the copper core. This was my last one and is by far the best. And those colors look so pretty together. I love them!
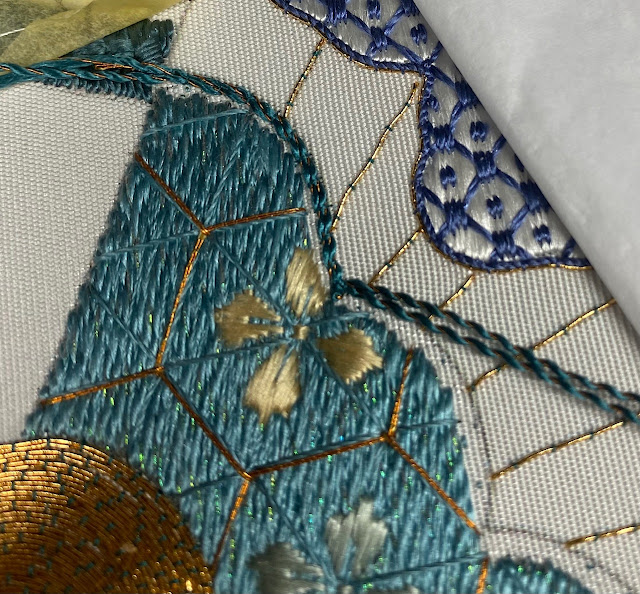
I started the cloud border by couching down a pair of the katayori (half-hitched on a koma) with 1-->2T in the same teal color as the katayori, which is just a shade darker than the actual cloud foundation. I started along the outside edge of the cloud border printed on the fabric:
I placed a couching stitch at every ridge, but I did more in the corners to help secure them:
You're supposed to take an extra stitch on the corner over the inside thread to really emphasize it and point it down toward the cloud, but sometimes it made the thick katayori thread kink up a bit, like on the middle one:
I couldn't always get it to make a smooth even point, so I just did my best with it. Here is the first row complete:
Then I sank the ends, which was much easier than sinking the fan rib line ends:
After that, I started the second row on the inside of the first row, again couching down at every ridge:
I tried extra hard to make the corners nice, while making sure they were emphasized, and some turned out very well; that center one looked better after I couched down the inside row of katayori:
And here is the second row done, with the ends sunk:
Not every corner is consistent, but overall, I do think it looks very pretty and makes the cloud look quite finished and polished.
For the shippo cloud, I made my katayori with a mix of light and dark green silk, using a coppery brown silk couching thread as the core (because the copper metal looked too orangey next to the green):
The silk I used for this one had 16 sugas instead of 10, so it turned out a bit fluffier, but I think katayori generally is supposed to be a little fluffier. And then I followed the same process as described above for couching down the borders. Here is the shippo cloud outside row complete:
And here is the entire border complete:
It was a little tricky couching over the edges of the raised shippo segments, but I think it turned out lovely. The colors of this cloud are just so beautiful (to me anyway).
My sayagata cloud katayori was like the hanabishi katayori—teal silk thread in the same color family but a darker shade than the foundation, with a #1 copper core. I followed the same process, but I tried to emphasize my corners a little bit less to keep the thread from kinking up:
And here is the sayagata cloud border complete:
I do think the corners, for the most part, are better on this one, so I'm glad I made that change. Again, I just love the colors.
It was very exciting at this stage because I had finally had to remove all the quilting paper in order to do my cloud borders. I hadn't seen some of these elements in ages, and it was thrilling to see them all come together and finally see how the colors worked with each other. Here is everything done so far:
I love it. It's so vibrant. And it's so close to done. I have only the fan outline left to do on the left side and the curved top. That will be in my next post, coming soon!


Comments
Post a Comment