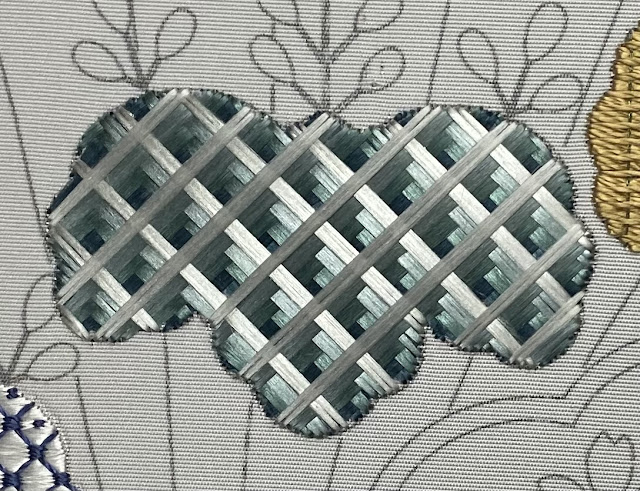
I finally completed one of the paulownia leaves on my Hiogi fan. I did this particular leaf in 3D effect, which is essentially the same as battlement couching in regular surface embroidery. That's not what the box chart called for, but I wanted all my leaves to be novel effects for this piece so that I could learn a bunch of different techniques.
I started by marking gridlines at a 45-degree angle to the weft, 8mm apart. I originally tried to do this with a white pencil, but I couldn't see it at all, so I switched to a blue pencil:
I got some of my measurements a little off, so there are some smudged lines where I tried to fix that. It's actually quite tricky to do this precisely. And the curved lines of the leaf veins were creating an optical illusion that made it hard for me to tell whether each line was straight. 😂 Oh, the trials of geometric effects!
Anyway, I decided to go from dark to light on this leaf because I think it creates a more subtle and pleasing 3D effect. So I started with my darkest teal silk thread, using 2F strands, and made two long stitches side by side over each of my gridlines:
Each set of two stitches should ideally take up 2mm of space (so that the four colors fill up the 8mm space between each gridline), but I couldn't achieve that without having a gap between them, which showed the fabric. So I just stroked the silk to make the two stitches as wide as possible (they were 1.5mm to 1.75mm wide in general). After doing all the stitches in one direction, I then went back and stitched all the perpendicular stitches:
Next, I did the same thing with color 2, which was a medium teal:
And from there, color 3, a light teal:
And finally, color 4, which is a silvery, almost white color, but in the same family as the previous colors:
You really start to get the 3D effect here. And happily, the four colors did fill up the space pretty well. I think my last color or two might have had 16 sugas instead of 12. They definitely seemed a little fuller.
Anyway, at this point, I did one more layer using a #1 iridescent green metallic thread, half hitched on my needle — just one stitch this time, though:
I really, really like it — just a nice sparkly touch, and the color is a perfect match. The final step to complete the 3D effect was to couch down the corners of the metallic threads. I used a dark teal couching silk and made two stitches in the weft direction over each corner:
This step actually takes away from the 3D effect for me (I think it looked cooler before), but it's necessary to hold down the layers. So, ehh, what can you do? ¯\_(ツ)_/¯
To complete this leaf, I then couched down a pair of #4 copper threads around the edges, using the teal silk couching thread:
I like the contrast. I think it's really pretty. And I'm happy to have one leaf fully done. 😊 Next up is woven effect! It's also a really cool stitch, so look for that in my next post.


Comments
Post a Comment