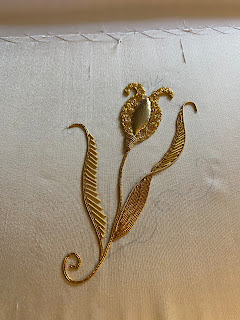
Yesterday afternoon and evening, I continued working on my goldwork project, which is coming along nicely. I had finished the right leaf, so it was time to start work on the left leaf. First up was stitching down the little lengths of rough purl. Rough purl is almost exactly the same as smooth purl and is applied in the same manner. It's just a little more matte than shiny.
So I cut up the lengths I needed and stitched through the little tubes of rough purl to attach them to the left leaf:
They are just a little bit more spaced out than the smooth purl ones on the right leaf, but that was intentional. I wanted to see if I preferred a tiny bit more space between the lines. I actually like them both and think having different spacing adds a bit of variety. Depending on the project, I could see doing these either way.
Unfortunately, the rough purl strand that came with the kit had a lot of kinks in it, so some of my little pieces curve a bit oddly. I wish I had used only perfect pieces from it so that they would have laid in perfectly straight lines next to each other. But I still think it looks okay. A little imperfection in nature is perfectly natural after all, and this is a leaf. :)
To finish off that leaf, I couched down a line of pearl purl along the right edge, ending in a curly little flourish at the top:
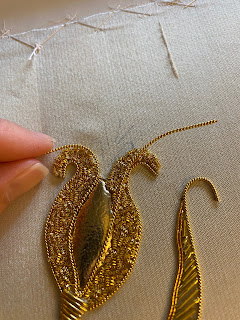
Then it was on to outlining the tulip. I stretched out my pearl purl just a bit more since it looked like I was running a little low (this turned out to be a great decision as I used absolutely every millimeter of it), and then I started adding the borders to the tulip with it:
This really gave the tulip a more finished look. After doing both the outer edges, it was time to outline the inner part of the tulip:
As couching down pearl purl ends takes a little extra work, I decided to try bending the pearl purl at a sharp angle so that I wouldn't have to couch down two ends in the same spot. I also wanted to see how well this would work, since part of this project is about learning to handle goldwork threads in different ways and seeing what works best and what doesn't.
This worked okay, but honestly, it's tough to get pearl purl to bend sharply at the exact angle you want it to, and to get it cooperate, I ended up having to couch down that angle about as much as I would have had to couch down the two ends.
Couching it down through the leather and bright check pieces got a bit tricky in some spots, but I managed it. When I got to this point in the picture below, I ran into a bit of a dilemma:
The pearl purl was supposed to continue straight up from the leather along the blue curved line there and end in a little curl. But I didn't really love the look of it — either in the photo that came with the kit, or when I laid it along that line myself. The rest of the tulip just felt unfinished to me without any kind of a border. It looked like a mistake.
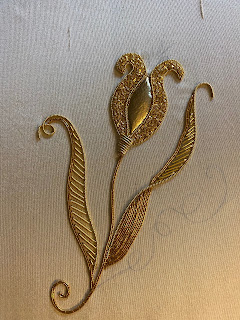
So I decided to deviate from the pattern and simply couch the pearl purl down all the way around the tulip's edge instead. I figured I could use some gold passing thread to cover the blue lines since I'm supposed to use gold passing thread on the three little lines just above that. Here's how the tulip looked with the pearl purl border all the way around its edges:
I really liked this much better. It felt finished and refined, and I think it looks just right. So now all that's left to do is add the gold passing thread to the curlicues on the right and the lines above the tulip and add a few beads as well. I can't believe how quickly this one has gone! But I'm really pleased with my progress.


Comments
Post a Comment