I finally started stitching the goldwork on my new project over the last couple days and made some good progress. Yesterday and today were busy, frustrating days filled with internet issues, so I had no extra time to blog. Now that I have a new router, I can fill you in.


I don't know if you're supposed to bend the Jap back over itself on the reverse side, but it didn't seem to like going in that direction. So I just continued it in the direction it had been going on the front; it was just now on the back. That worked well enough for me, and it seemed a more natural direction for the thread.


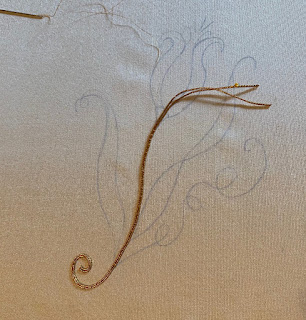
The first step in this project was beginning to couch the Jap. I used a gold translucent thread so that the couching would blend in pretty well and allow the Jap to really stand out. But first I had to wax my thread. I have never done this before, but the books said to thread a needle, and then grasp the eye of the needle and run the thread over the wax a few times (this is the best shot I could get without a third hand):

The thread caught on the edge of the wax and seemed to get coated pretty well. Next, I ran the thread between my thumbnail and fingernail to remove any excess. After that, I bent my piece of Jap in half and started laying it down from the bend as two lines of Jap side by side. To couch it, I made tiny, perpendicular stitches over the pair of thread along the main stem line in the pattern:

When I got to the end, I had to take a truly enormous plunging needle (I think it was a really big chenille needle), stab it halfway down, thread an end of the Jap through, and plunge it down to the back. Then I did the other end (you have to do these one at a time so they can each go through their own hole, which apparently helps them lay side by side). I left the ends about twice as long as they should have been on this first pair, but I was afraid I wouldn't have enough. It turned out to be way more than I needed. I think an inch and a half would have been perfect. So that's what I did for the rest of the Jap:

In the area above, I was couching several pairs of Jap next to each other to form a leaf. (You can see the ends I left are much shorter this time around.) I was surprised by the way pairs are couched next to each other. You come up on the outside of the new pair, and go down between the pairs at a diagonal angle towards the last pair, which helps keep the pairs snug against each other. I thought it would be the opposite (come up on the inside, go down on the outside), but both my goldwork books said the correct way is to come up on the outside. It did work pretty well, but I had to the use the mellore (the little gold tool) to help get some of them to lay smoothly next to each other. Confession: I have no idea if I used the mellore correctly, but whatever I did worked.
I sewed down the ends on the back a few at a time, but if I had to do it over again, I wouldn't try to sew down more than one pair in any area at once. It got really hard to sew down more than that at one go:

I did find that a curved needle was helpful for this part. I was too apt to catch the silk with a straight needle, and I had to cut away some threads that peeped through to the front. The curved needle allowed me to catch just the muslin backing so that I could secure the ends down without anything showing on the front. This was a number 10 curved needle, and it worked pretty well. This is what it looked like after I'd sewn down all the ends:

Next, I started doing the padding for some cutwork and leather:

The kit came with some kind of wadding that I was supposed to use for padding, but the instructions for how to use it were vague at best ("stuff it under the leather"). So I decided to use some felt padding instead, since I happened to have it on hand, and both my goldwork books recommended felt padding and contained detailed instructions on how to use it.
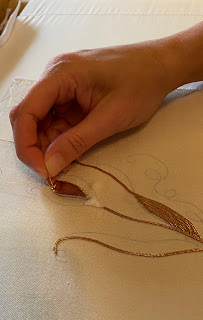
The next step was to sew the gold leather down over the padding:

To do this, I came up through the fabric very close to the edge of the leather and down into the leather, fairly close to the edge. I did very tiny stitches about 1-2 mm apart all the way around, and this was the end result:
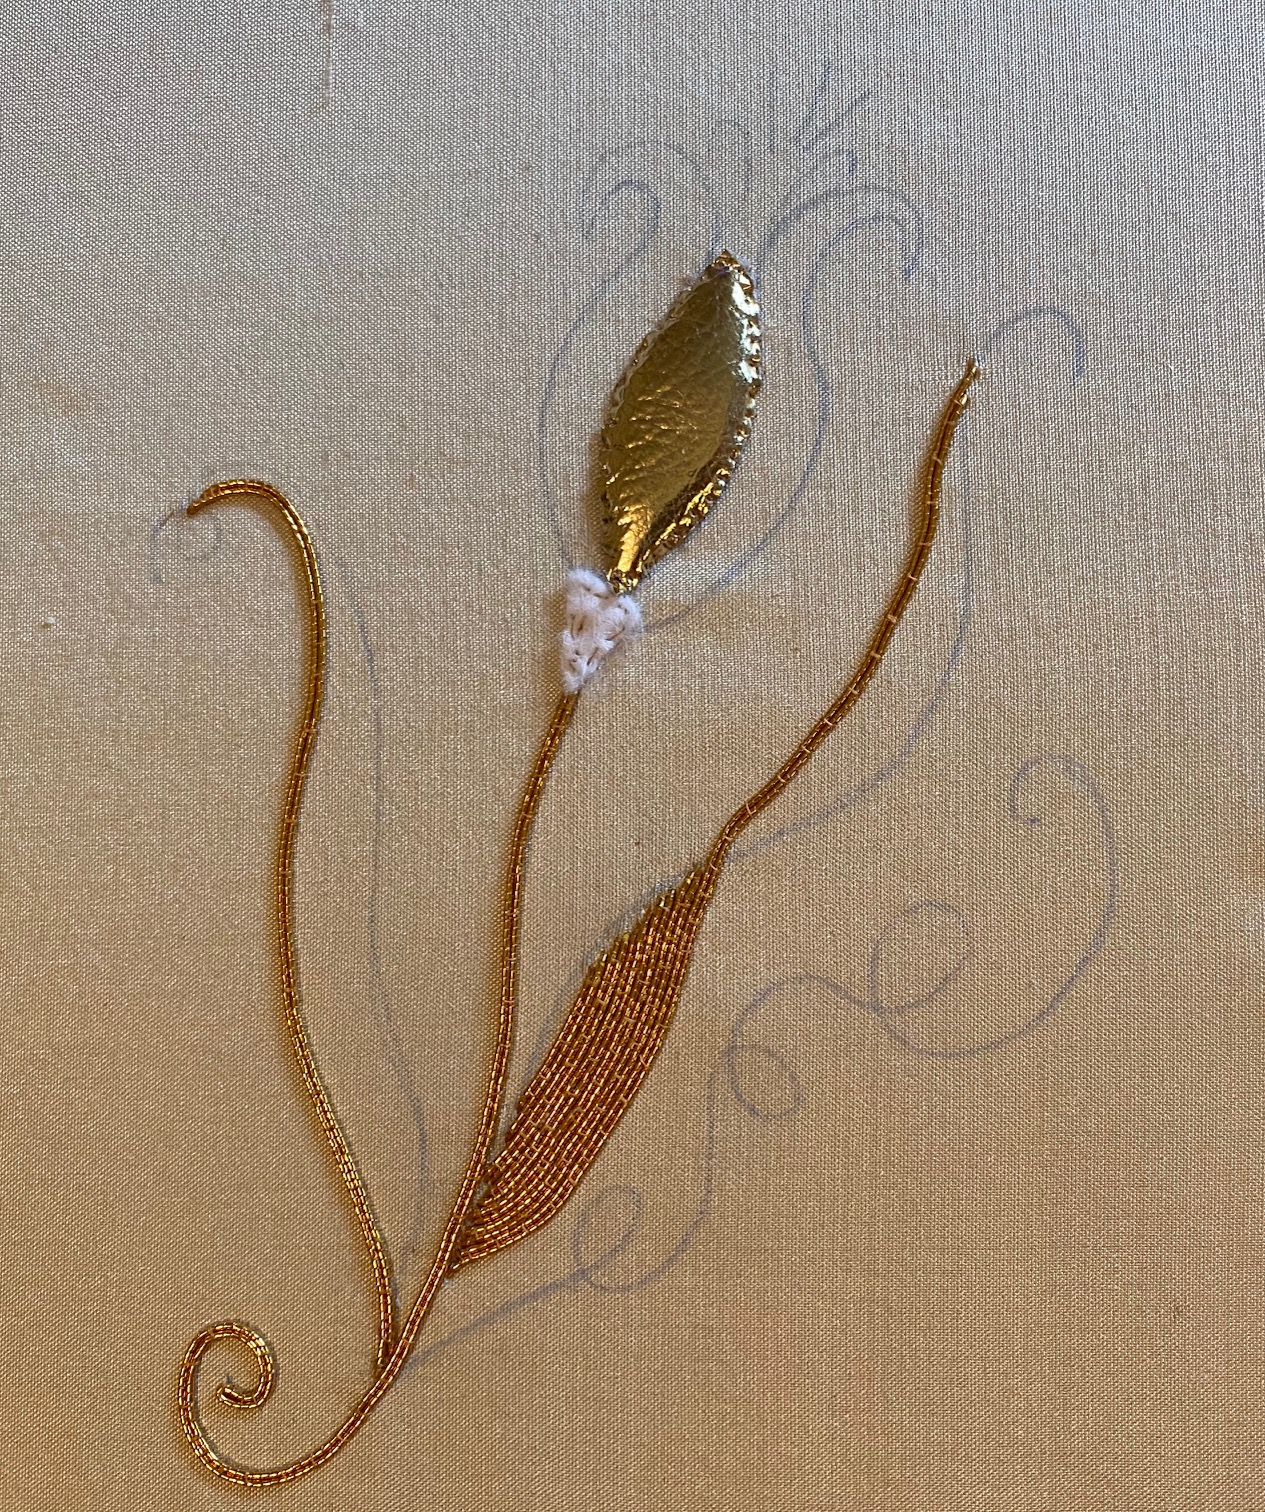
I think it looks pretty good! Not bad anyway for a first effort. So now the Jap, leather, and padding are done. The bright check step is next! I believe I have to cut up the bright check cord into lots of tiny pieces and then sew them down like beads very close to each other. Should be fun!
Comments
Post a Comment